
installation
This is an old revision of the document!
Table of Contents
Part 1: How to Install Debian on a Virtual Machine
- Open VirtualBox.

- Click on New.

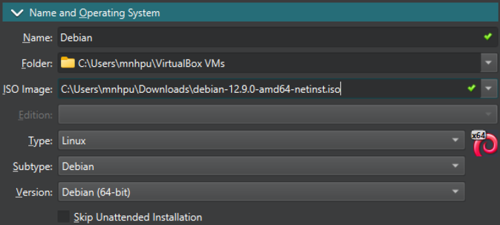
- Go under the Name and Operating System tab.

- Type in the name of the OS which is Debian.

- At ISO Image, click the drop down menu and click Other.

- Choose the downloaded Debian .iso file.

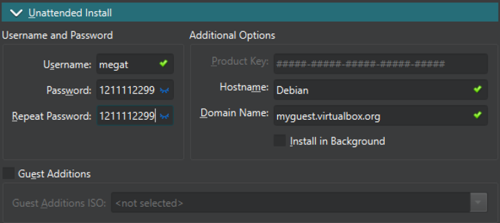
- Go under the Unattended Install tab.

- Change the username and password to your liking.
- Go under the Hardware tab. You can change the Base Memory and Processors according to your liking. We will keep it as is.

- Go under the Hard Disk tab. You can change the hard disk space and other settings. We will keep it as is.

- Click Finish.

- Wait for the installation to finish.

- After installation, it should look like this.
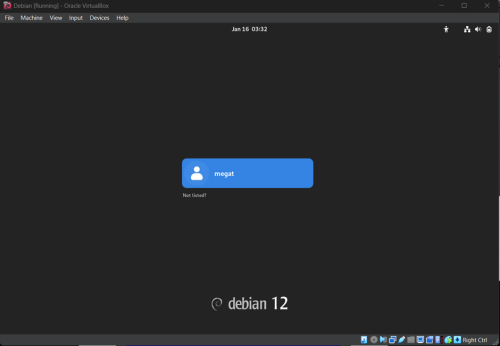
- Click the username and sign in using the password you set before.

- Debian OS is now installed successfully!


Enabling root and superuser on Debian
- Click on Activities on the top left corner of the screen. You can also press the Windows key as a shortcut.

- Search for Settings and click on it.

- On the left pane, scroll down or search for Users and click on it.

- On the blue bar at the top of the page, click Unlock.

- Then, enter your user password as the Administrator's password. In my case, it is 1211112299. Once that is done, you should notice that the blue bar is gone.
- Now press Activities again, and search for Terminal. Click on it.

- Type
sudo whoamiand see the results.

The user megat is not in the sudoers file, we need to change that.

- Type
su rootto go into root.

Notice thatmegat@vboxchanged toroot@vbox.

- Type
sudo visudo /etc/sudoersto edit the sudoers file.

- Search for the line
# User privilege specification.

- Add the line
megat ALL=(ALL:ALL) ALL.
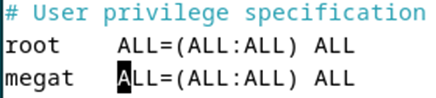
- Save the file using Ctrl + O → Enter → Ctrl + X.
- Type
exitto exit root.

- Type
sudo whoamiagain and see the difference.
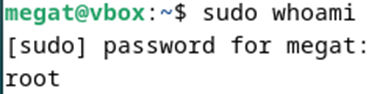


Congratulations, user megat now has sudo permissions!
Installing Windows Manager
Debian 12.9.0 comes preinstalled with GNOME desktop environment. The following steps will show you how to install another desktop environment.
- In terminal, type
sudo tasksel.

Notice that the terminal will look like this.
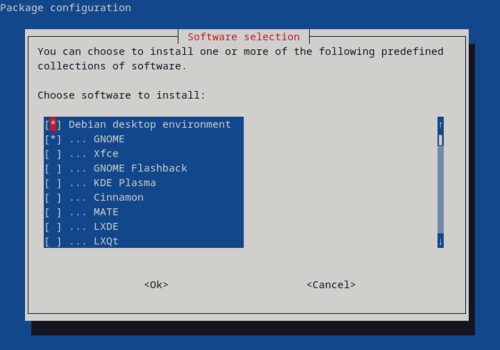
- We want to install the Xfce desktop environment. Navigate the menu using up and down key. Press space to mark Xfce for installation. Make sure there is the (*) symbol.

- Press Tab until Ok button is highlighted.
 Press Enter.
 - Wait for the installation to finish.

- Once its installed, let's switch to the Xfce desktop environment. Click the top right button.

- Click the power button.

- Click Log Out…

- Now, click your user.

- Click the Gear icon on the bottom right corner.

- Click Xfce Session.

- Login as usual.
- You have successfully changed your desktop environment!


installation.1737136362.txt.gz · Last modified: 2025/01/17 17:52 by 1211112228